Lest we forgot the a relatively current picture of ME! Taken on
21 January 2004! You let me know how these dentures look!
At the very bottom of this page, I have included the actual pictures of the front six teeth
that I had extracted from the upper jaw. In my goofy way, I only asked to keep the two front teeth
(you can see the humor that I was going for there!) Anyway, Doc gave me all six of those teeth,
so I kept them. I'll explain the molar below!
This is my lower jaw all healed up so far and just before the mini-dental implants are installed. Note on
the left side of the picture that there is significant bone loss. This is from a tooth that cracked when I was
a child and had not extracted completely until I joined the U.S. Air Force years later!
This is the upper jaw and from the shot, you can see that I have healed very well. As with the lower jaw,
on the right side of this shot you will see significant bone loss in the right rear area. This was due to two
extractions I had in my 20's.
This is a shot of the mini dental implants once they had been screwed into place. The procedure is
amazingly simple, but for me - the discomfort was interesting. Not pain - a lot of discomfort though. Now
that the denture is fitted with the caps, everything is settling down very nicely and the lower denture is
VERY secure!
UPDATE! (4/2/2004) The photo shows four pins. The two inner pins are set up nicely so far and are in place. The two outer pins
are in spaces that had been the socket that a tooth was in and both of those pins have been removed and the four caps in the
denture have also been removed. Doc will be resetting the two pins farther back in the jaw in a position that is better healed. We
will leave the pins in without "loading" them for possibly about a month so they integrate better with the bone - then I'll have him
place the caps a "load" the implants once he is satisfied that they have set fully!
As with all of the pictures on this site, if you click on the picture - it gets huge! I just keep them tiny here to save space on the
page!
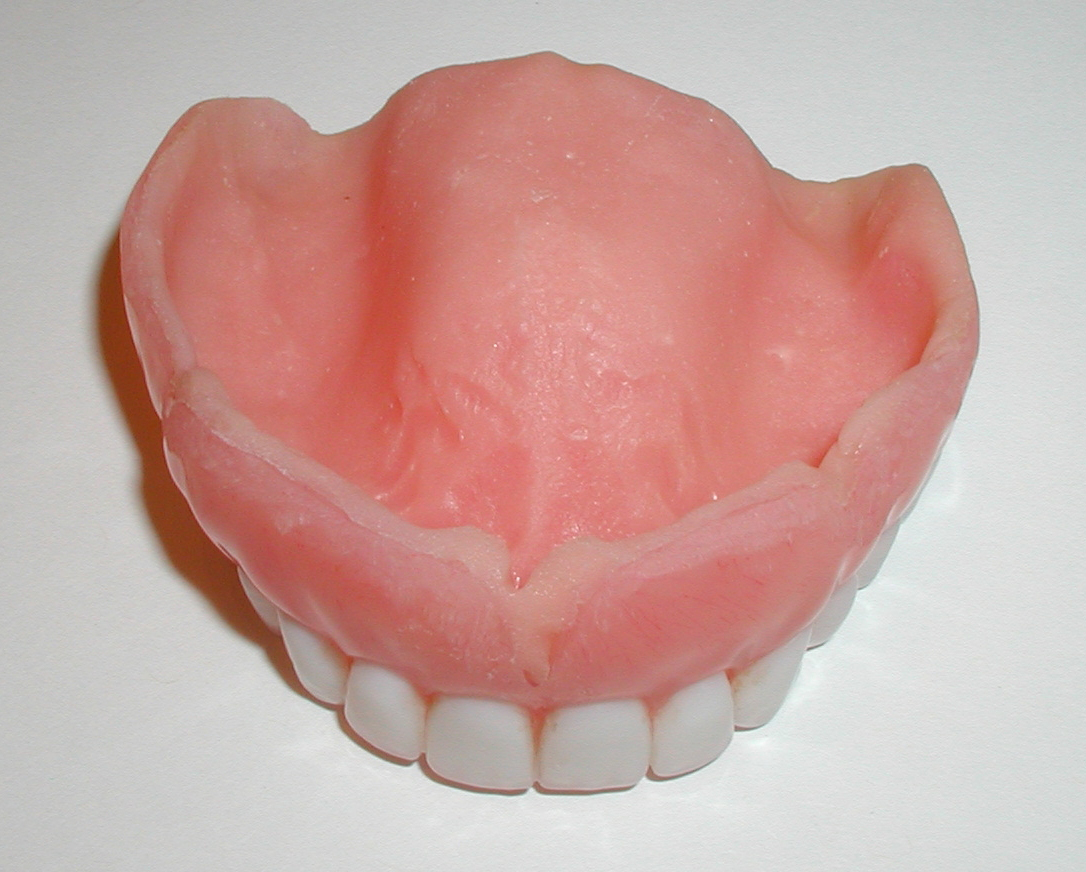
This is a shot of my complete upper denture. I do not like the full pallet plate, gag reflex, taste, comfort and
speech basically, so I am about to cut it out. The liner is a soft reline.
This is the first cut I made - less is more, If I cut out too little, I'm OK! If I cut out too much, I have to buy new
teeth! So I go VERY slowly in doing this work - I am not a professional!
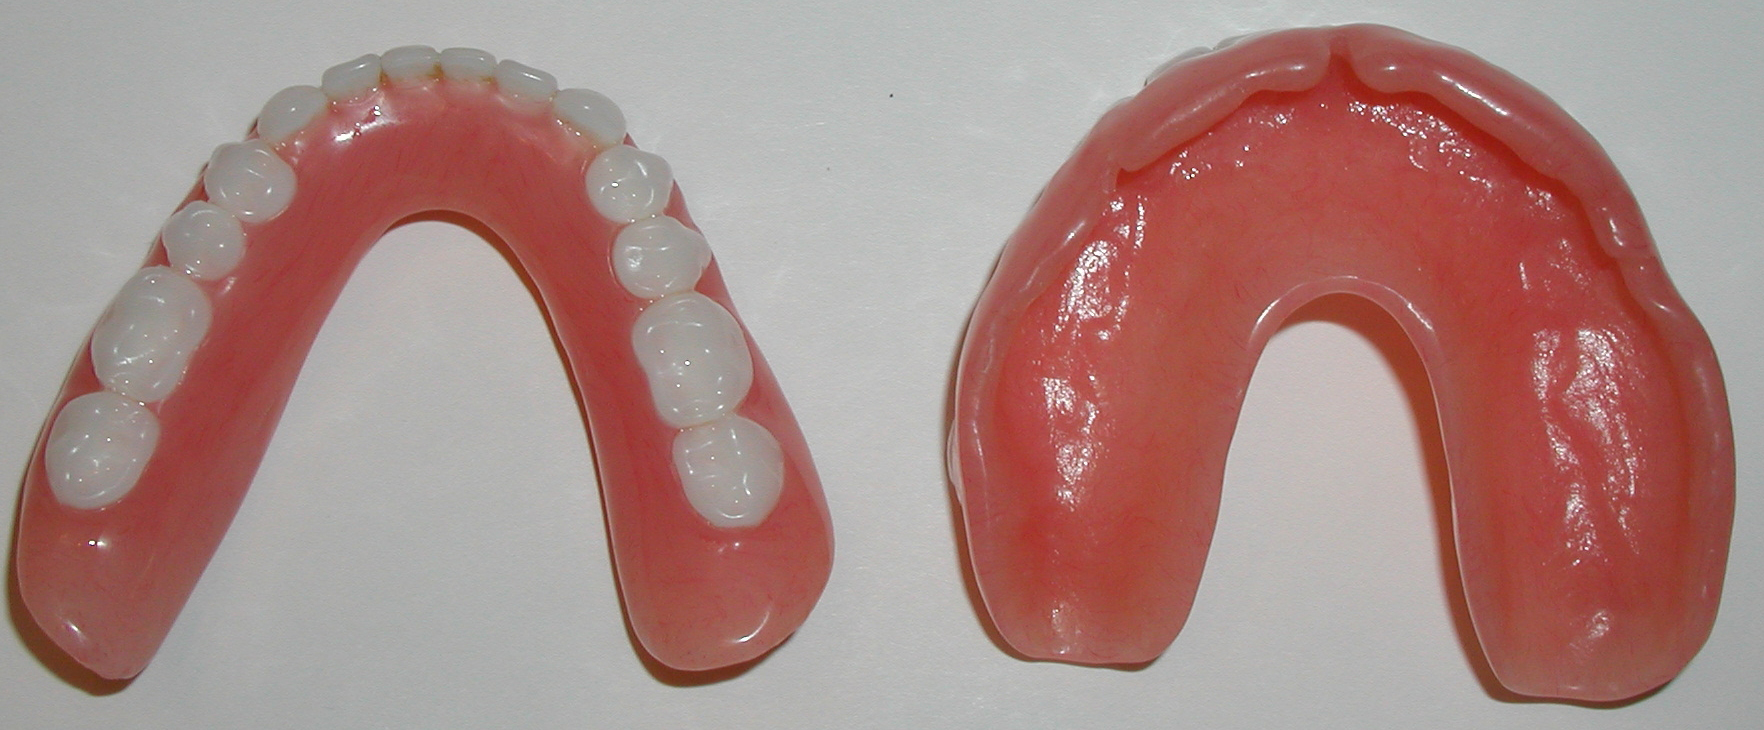
These two shots show the final work that I did - over time I tweaked a little bit here and there, but it looked very
little from this result, most of the adjustments I made actually had been on the inside of the denture for comfort,
again realizing that if I screwed it up, I'd be paying for new teeth!
How did I cut out the center part? I used my trusty Dremel Rotary cutter - looks like a dentists drill, so I thought
I'd try it. Remember that I experimented heavily on the original upper denture and before that I practiced on a
plastic CD-ROM case for a few hours to make sure I had the hand skill to make very minor changes. I used the
cutter blade to remove large chunks of material, the I used this flat drill bit to lightly grind material away.
I use regular tooth paste to clean my dentures, I use this a lot during the tweaking phase
also to knock off loose particles that you can see in some of these pictures! They say you
can about use anything to clean your dentures, but since I still brush the entire inside of my
mouth, why not use the same thing on my denture - I do soak them at times in Efferdent,
but I brush them every day very well!
CLEANING UPDATE: I do still use toothpaste from time to time, but for the most part, I clean them with the toothbrush and an anti-
bacterial hand soap. I can clean them like crazy, while rinsing my mouth out with the new Orange Listerine. I brush my mini
implants very well. Once a week, or about every ten days, I use a quarter cup of bleach and fill the rest of my tooth cup with warm
water. I then brush the dentures very well for about fie to ten minutes to remove any plaque that starts to build up. This also
keeps my denture teeth very white. DO NOT SOAK your teeth in bleach! I never found out - but I assume it will warp or destroy
your denture rather quickly!
I use the newest cleaning as described because with the soft lining, we cannot soak them in Efferdent - it eats away at the soft
lining like it is a bacteria.
Hard Reline Photos!
These pictures below are all after the hard reline was done on 12 JAN 04! Notice that the edges are all smooth and shiny on the
outside, all the edges that meet up with my mouth are very smooth and comfortable. The inside of the denture matches the inside
of my mouth, of course some material might not be so smooth - air bubbles and other "flaws" in the reline can make a few spots
sore. Your dentist can fix that, I just used the light drill technique that I developed doing the stuff above, plus I used a little ball drill
bit to make minor adjustments - I have to be extremely careful with that one - it would eat right through the denture material in no
time flat!
This is looking down on the upper denture! Doc had his technician reline it with the cut out in tact! The
technicians that work IN THE OFFICE with my Doc are true artists! This thing fit like magic!
A couple shots of the teeth side by side...
And from straight down.
Lastly a shot from the front...
And from looking out!
Keep in mind the drastic change that I went through in the appearance of my smile!
A note about my experience:
My experience went VERY well, with hardly any discomfort and excellent results! I did a LOT of reading and in all, about 4.5 years
of research, the last two with Doc! I knew what to expect and at what points to expect it. I had a lot of support from my wife and my
Doc. I also have a good tolerance for pain in my opinion. Every one of us is different and your results may be dramatically
different than mine.
I had the specific goal of saving the most amount of bone as possible before I had too much loss! I will not know for 20 more years
if I was successful, but I was certain that by age 60 that I would have had to do this anyway. So I took advantage of the
"opportunity" to have Hollywood beautiful teeth made while trying to preserve the bone structure I still had!
I hand picked the teeth that I have down to the company and the color shade! I had support from the company that manufactures
the teeth. I had support from the website for Fixodent which is an excellent resource for those wanting to know what life will be like
AFTER you have dentures as well as for those thinking about them. Do a search on Fixodent to find it - I asked them if I could link
to the site, but have not heard back yet.
The bottom line is that I had excellent care by an excellent Doc and his staff. I did my homework and knew what to expect every
step of the way. Once they are gone - their gone, do your research and know what your going to go through first!
Financial - I will eventually get a cost record as well, keep forgetting to do that. But note that I did this with no insurance, being self
employed, I have no dental insurance - I paid cash for this whole process. It did cost thousands of dollars (US dollars) though!
Lastly if you have any questions for me - feel free to ask - no sexual fantasy stuff, who knew there was such a thing??? I have my
teeth in my head all the time except for cleaning them, so it is really moot anyway.
Best wishes for excellent health!
Ray Hayden
These are the actual teeth extracted from my head! You can see that the tooth you see in your smile is only
about one third the size of the whole tooth! If you look very carefully at the left most tooth, then to the left side
of it, you see a dark line along it. That is actually part of the bone that came out with the tooth! If I was to turn
the tooth sideways and take a picture, people might just pass out from it. Even with that, I had no discomfort!
Doc took very good care of me and kept me from being in pain! My eyes did tear up, a natural occurrence with
the extraction of the eye teeth. NOTE: The two center teeth are bonded and not the original shade, the darker
one on the right is the one with the root canal that made that tooth dark yellow all my life!
Same teeth, I add the molar to this picture. Take a very good look at the tooth. The roots are grown together
and the bone was growing through the center whole! Doc got this one out with a lot of effort. My Doc is not all
that big in size - I thought he'd have to put his foot against my head to get this one out! Too funny, again, no
discomfort on my part though!


This is my lower jaw all healed up so far and just before the mini-dental implants are installed. Note on the left side of the picture that there is significant bone loss. This is from a tooth that cracked when I was a child and had not extracted completely until I joined the U.S. Air Force years later!
This is the upper jaw and from the shot, you can see that I have healed very well. As with the lower jaw, on the right side of this shot you will see significant bone loss in the right rear area. This was due to two extractions I had in my 20's.
This is a shot of the mini dental implants once they had been screwed into place. The procedure is amazingly simple, but for me - the discomfort was interesting. Not pain - a lot of discomfort though. Now that the denture is fitted with the caps, everything is settling down very nicely and the lower denture is VERY secure!
This is a shot of my complete upper denture. I do not like the full pallet plate, gag reflex, taste, comfort and speech basically, so I am about to cut it out. The liner is a soft reline.
This is the first cut I made - less is more, If I cut out too little, I'm OK! If I cut out too much, I have to buy new teeth! So I go VERY slowly in doing this work - I am not a professional!

These two shots show the final work that I did - over time I tweaked a little bit here and there, but it looked very little from this result, most of the adjustments I made actually had been on the inside of the denture for comfort, again realizing that if I screwed it up, I'd be paying for new teeth!
How did I cut out the center part? I used my trusty Dremel Rotary cutter - looks like a dentists drill, so I thought I'd try it. Remember that I experimented heavily on the original upper denture and before that I practiced on a plastic CD-ROM case for a few hours to make sure I had the hand skill to make very minor changes. I used the cutter blade to remove large chunks of material, the I used this flat drill bit to lightly grind material away.
This is looking down on the upper denture! Doc had his technician reline it with the cut out in tact! The technicians that work IN THE OFFICE with my Doc are true artists! This thing fit like magic!

A couple shots of the teeth side by side...
And from straight down.
Lastly a shot from the front...
And from looking out!
These are the actual teeth extracted from my head! You can see that the tooth you see in your smile is only about one third the size of the whole tooth! If you look very carefully at the left most tooth, then to the left side of it, you see a dark line along it. That is actually part of the bone that came out with the tooth! If I was to turn the tooth sideways and take a picture, people might just pass out from it. Even with that, I had no discomfort! Doc took very good care of me and kept me from being in pain! My eyes did tear up, a natural occurrence with the extraction of the eye teeth. NOTE: The two center teeth are bonded and not the original shade, the darker one on the right is the one with the root canal that made that tooth dark yellow all my life!
Same teeth, I add the molar to this picture. Take a very good look at the tooth. The roots are grown together and the bone was growing through the center whole! Doc got this one out with a lot of effort. My Doc is not all that big in size - I thought he'd have to put his foot against my head to get this one out! Too funny, again, no discomfort on my part though!